Transitioning from English to Western Saddle: What Changes?

Western Riding

Switching from an English to a Western saddle can feel like stepping into a different world — even though you’re still riding a horse! Whether you’re curious about trail riding, exploring Western disciplines, or simply want a more relaxed ride, this transition brings some key changes that’s worth familiarising yourself with.


1. The Saddle Itself

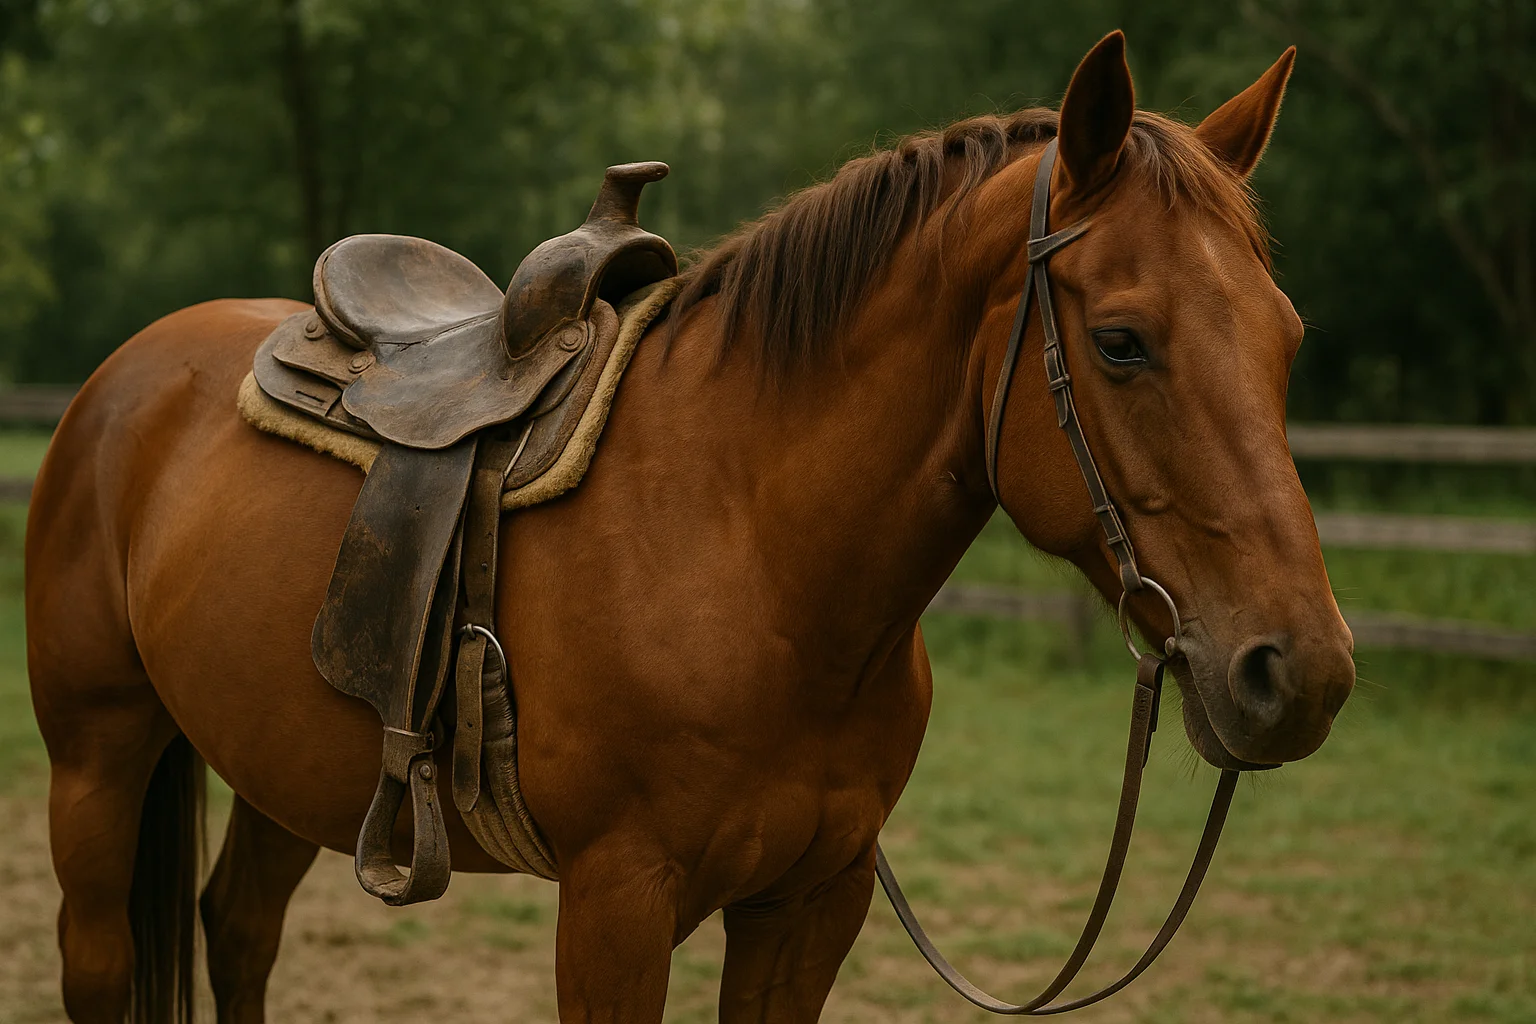
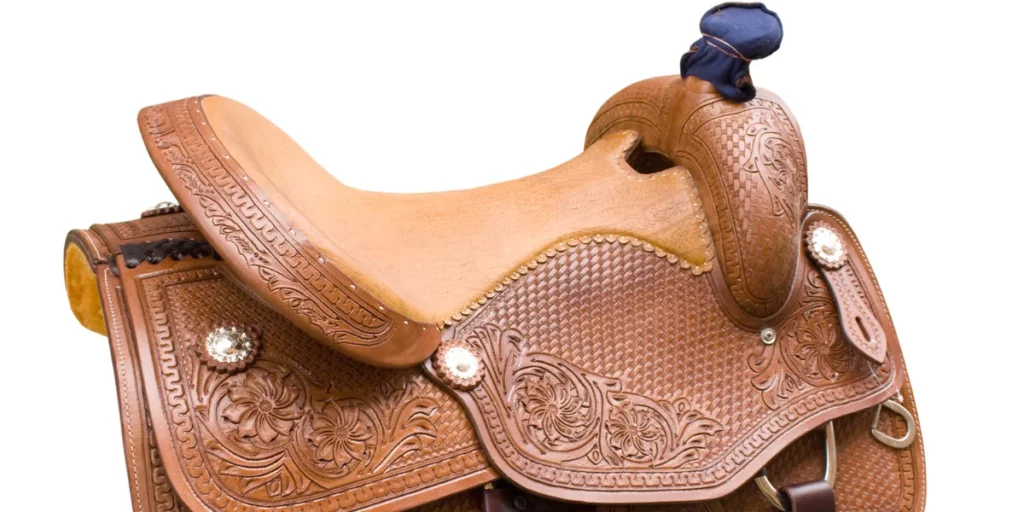
The most obvious change is the saddle. Western saddles are generally larger and heavier than English ones, offering more surface area for distributing the rider’s weight.

  • Structure: Western saddles have a horn, deeper seat, and higher cantle for added security.
  • Weight: Be prepared for a workout as western saddles are much heavier!
  • Purpose: Designed for comfort during long hours of ranch work or trail riding.

2. Riding Position and Balance

Your seat and leg position will shift slightly.

  • Seat: You’ll likely sit deeper and more upright in a Western saddle.
  • Legs: Legs naturally fall longer; stirrups are usually adjusted longer than in English riding.
  • Balance: The saddle offers more support, but you’ll need to adjust how you balance, especially if you’re used to a more forward seat like in jumping.

3. Tack and Equipment Differences

Beyond the saddle, tack setups also vary.

  • Bridle: Western bridles may lack a noseband and often feature curb bits with shanks.
  • Reins: Split reins or romal reins replace the single loop of English reins.
  • Padding: Saddle pads are thicker and often shaped to the contours of the Western saddle.

4. Aids and Cues

Communication with your horse may change subtly.

  • Neck Reining: Many Western horses respond to neck reining rather than direct contact.
  • Seat and Weight Cues: Western riding often relies more on subtle body cues than rein pressure.
  • Contact: Expect a looser rein with less constant contact than in English styles.

5. Gaits and Movements

You’ll encounter some differences in how gaits are ridden or labeled.

  • Jog vs. Trot: The Western “jog” is a smoother, more relaxed version of the English trot.
  • Lope vs. Canter: The “lope” is a slower, more collected version of the canter.
  • Posting: Posting is uncommon in Western riding, as the jog is smooth enough to sit.

6. Disciplines and Activities

The goals and riding styles can shift too.

  • Western Disciplines: Reining, cutting, barrel racing, trail classes, and ranch work.
  • Pace: Western riding often feels slower and more deliberate.
  • Mindset: Emphasis on utility, calmness, and minimal movement in many Western events.

7. Tips for First-Time Western Riders

If you’re getting in the saddle Western-style for the first time, here are some key tips to make your ride smoother and more enjoyable:

1. Don’t Rush the Tack Setup

Western tack is heavier and may feel bulkier than what you’re used to. Take your time learning how to properly cinch a Western saddle — it usually includes a front cinch (girth), and sometimes a back cinch and breast collar. If unsure, ask for help at your barn or watch a detailed video before you ride.

2. Get Used to the Horn — But Don’t Rely on It

The saddle horn is handy but shouldn’t be used as a handle to balance or pull yourself up. Learn to mount using the stirrup and pommel. The horn is there for specific tasks (like roping) — not for bracing.

3. Adjust Your Stirrups Longer

Unlike English riding, your legs will hang longer in a Western saddle. Stirrups should allow a slight bend in the knee while letting your legs relax. Don’t be afraid to hop off and adjust them until they feel just right.

4. Learn to Neck Rein (Gradually)

If your horse is trained for neck reining, start practicing using your outside rein gently against the neck while guiding with subtle cues. But always prioritize clear, calm communication with your horse.

5. Practice a Loose Rein

Western riding often involves riding with more slack in the reins. It can feel unusual at first if you’re used to constant contact, but it encourages better balance, communication through your seat, and trust in your horse.

6. Embrace the Relaxed Pace

Western disciplines tend to favor calm, collected movement. Take a deep breath, relax in the saddle, and allow your horse to move at a steady, unhurried pace, especially at the jog and lope.

7. Dress the Part (Functionally)

Jeans and a heeled boot are more than a look, they prevent stirrup slips and protect your legs from saddle rub. A wide-brimmed hat or helmet can help with sun or branches on trail rides.

Conclusion

Transitioning from English to Western is more than just swapping saddles, it’s embracing a new mindset and riding culture. The good news? Many principles carry over, and the versatility you gain makes you a better-rounded rider. With time and practice, the Western saddle might just become your new favorite seat.

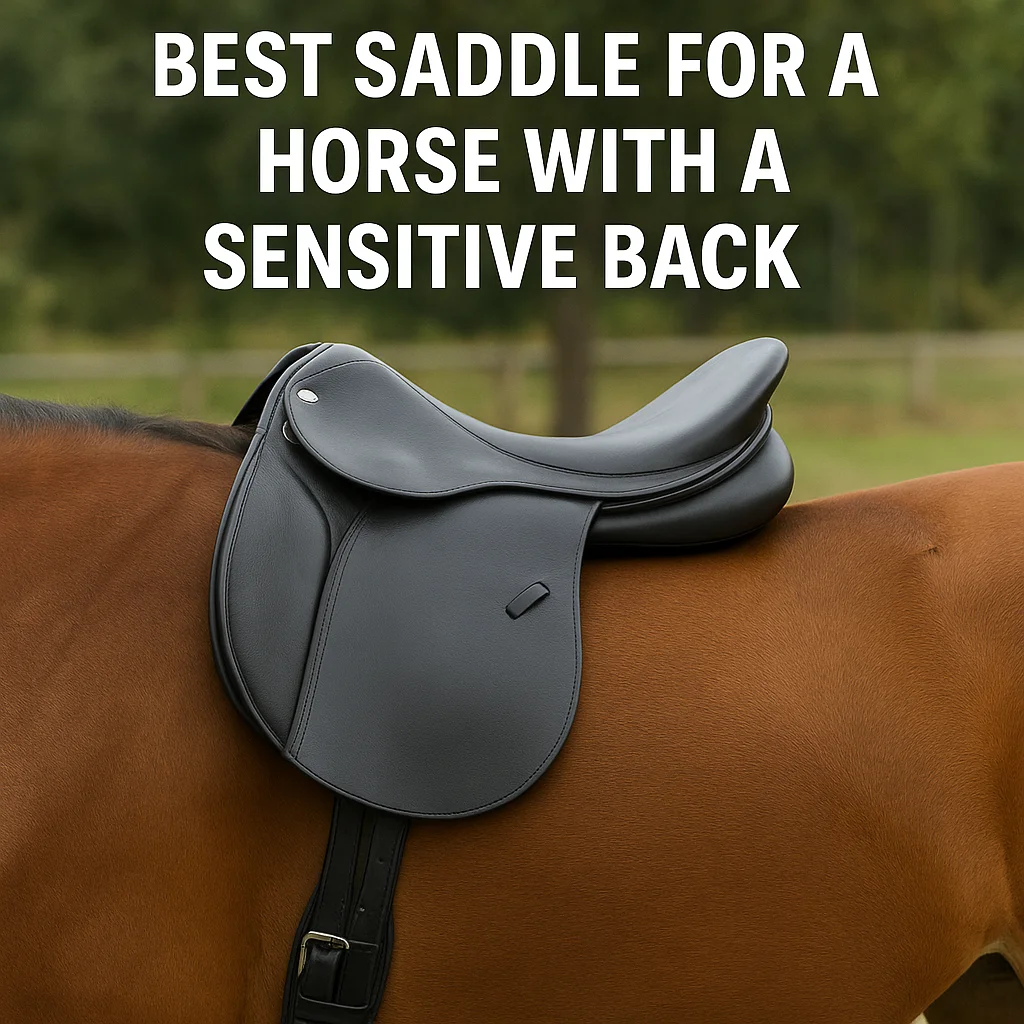
What is the Best Saddle for a Horse with a Sensitive Back?

sensitive back

Horses with sensitive backs need more than just a comfortable ride—they need protection, precision, and support. Whether your horse has shown signs of discomfort, back soreness, or behavioral changes under saddle, choosing the right saddle can make a world of difference.

Horse with sensitive back

So, what’s the best saddle for a horse with a sensitive back? Let’s break it down.

Table of Contents

    Understanding a Sensitive Back

    Horses can develop sensitivity in their backs for a number of reasons, including:

    • Poor saddle fit or pressure points
    • Overuse or incorrect training
    • Previous injury or trauma
    • Underdeveloped back muscles
    • Ill-fitting saddle pads or tack

    If your horse flinches when groomed, dips away from pressure, resists saddling, or shows discomfort during rides, you’re dealing with a sensitive back.

    Key Features to Look For in a Saddle

    When choosing a saddle for a sensitive-backed horse, comfort and fit are everything. Here’s what to prioritize:

    1. Wide, Even Weight Distribution

    Choose a saddle with wide panels and a tree designed to spread pressure across the entire back, not just the withers or loins.

    2. Soft, Shock-Absorbing Panels

    Wool-flocked or foam panels that mold to the horse’s back are ideal. Some premium saddles include memory foam or air-filled panels for even more comfort.

    3. Flexible or Adjustable Tree

    An adjustable tree can be fitted to your horse’s shape as their back changes with age, training, or condition, reducing the risk of pressure points.

    4. Lightweight Design

    Heavy saddles can aggravate soreness. Go for a lightweight yet supportive option that doesn’t add unnecessary strain.

    5. High-Quality Gullet & Spine Clearance

    Ensure there’s plenty of clearance along the spine and withers. Sensitive horses often have narrower spinal processes, so fit here is crucial.

    Top Saddle Types for Sensitive Backs

    Treeless Saddles

    • These distribute rider weight without a rigid tree.
    • They offer excellent comfort and flexibility but need a correct match with a proper pad.
    • Great for light trail riding and groundwork, but not always ideal for high-impact sports.

    Wool-Flocked Saddles

    • Can be custom adjusted by a saddle fitter
    • Provide soft, moldable contact with your horse’s back
    • Better shock absorption compared to foam-only saddles

    Air-Cushioned Saddles (e.g. CAIR systems)

    • Use air panels to eliminate pressure points
    • Maintain flexibility and adjust to movement
    • Popular in Bates and Wintec saddles

    Tip: Use a High-Quality Saddle Pad

    Even the best saddle can cause discomfort without the right pad. For sensitive-backed horses, consider:

    • Memory foam saddle pads
    • Sheepskin or fleece lined pads
    • Gel pads for extra shock absorption
    • Correction pads with shims for adjusting fit

    👉 Explore our collection of English saddle pads designed for sensitive backs

    👉 Explore our collection of Western saddle pads designed for sensitive backs

    Saddles to Avoid

    If your horse is sensitive, steer clear of:

    • Hard or synthetic panels without cushioning
    • Saddles with narrow gullets
    • Cheap, unbalanced models with uneven flocking
    • Saddles with broken or warped trees

    Don’t Skip the Saddle Fitter!

    A professional saddle fitter is a must-have when dealing with sensitive backs. They can assess your horse’s conformation, check for pain points, and recommend saddles that provide optimal comfort and performance.

    Final Thoughts

    There’s no one-size-fits-all saddle, but with the right support, your horse can enjoy pain-free movement and happier rides. Look for thoughtful design, quality materials, and proper fit above all else.

    Need help choosing? Reach out to our team at Ride In Style Saddles or explore our hand-picked saddle pads and accessories tailored for comfort and care.

    Can an Old or Cheap Saddle Hurt My Horse? Here’s What You Need to Know

    Old Saddle

    Can an Old or Cheap Saddle Hurt My Horse?

    Short answer: Absolutely, yes. Saddles that are poorly made, overly worn, or incorrectly fitted can cause discomfort, muscle strain, and even long-term spinal damage. Let’s break down why fit matters, what to watch for, and how to choose the right tack to keep your horse happy and healthy.

    Many riders underestimate the importance of saddle quality, often opting for less expensive options to save on costs. However, investing in good tack not only benefits the horse but also enhances the rider’s experience. A well-fitted saddle allows for better communication between the rider and the horse, improving performance in various disciplines such as dressage, jumping, and trail riding.

    Table of Contents

      Why Fit Is So Important

      For instance, a saddle that doesn’t fit can hinder your horse’s ability to move freely, which is crucial during events or work. Consider a horse competing in dressage; any discomfort caused by a poor fit could lead to subpar performance and frustration for both horse and rider. Thus, ensuring proper fit is paramount for achieving goals in equestrian sports.

      The saddle acts as the interface between you and your horse. If it doesn’t sit correctly or distribute pressure evenly, your horse will feel imbalanced. Over time, this can lead to:

      • Back soreness
      • Swelling or bruising under the saddle
      • Hollowing of the back or refusing to move forward
      • Bucking, rearing, or other behavioral issues
      • Permanent muscular or nerve damage

      No matter how gentle your hands or legs are, an uncomfortable fit can undo all your good riding.

      The Truth About Cheap Tack

      Lower-cost saddles may save money in the short term, but they often come with hidden risks:

      • Inferior materials that wear quickly or can’t mold to your horse’s back
      • Inflexible trees that cause pressure points
      • Stitching that frays or breaks
      • Poorly placed panels that dig into the withers or loins

      Cheap doesn’t always mean unsafe—but it almost always means you’ll need to invest in repairs or a replacement sooner rather than later.

      Are Older Options Just As Bad?

      Not necessarily. A high-quality used saddle can still be a great option, if it has been well cared for and correctly fitted. But years of use can break down even the best saddle:

      • Compressed or lumpy flocking
      • Twisted trees or loose rivets
      • Dried-out leather that becomes brittle
      • Uneven wear causing imbalance

      Pro Tip: Always have a secondhand saddle checked by a qualified saddle fitter before use.

      Signs Your Tack May Be Causing Harm

      Keep an eye out for these red flags:

      • Uneven sweat marks after riding
      • Sore spots, muscle atrophy, or heat sensitivity along the back
      • White hairs under the saddle area (a sign of long-term pressure)
      • A “cold-backed” reaction when tacking up
      • Behavioral changes under saddle

      How to Choose the Right Fit

      Whether you’re shopping new or used, here’s what to prioritize:

      • A tree that fits your horse’s withers, spine, and back length
      • Quality leather or synthetic materials that are durable and breathable
      • Even panel contact from front to back—no “bridging” gaps
      • A gullet wide enough to clear the spine completely
      • The help of a professional saddle fitter to make sure it all checks out

      Quick Tip:

      Investing in quality tack doesn’t stop at just the saddle. Consider also the importance of a well-fitted bridle and appropriate girth. These elements work together with the saddle to ensure your horse is comfortable and responsive. Poor-quality tack can lead to similar issues as an ill-fitted saddle and may compromise your riding experience. Make sure to choose reputable brands and consult with professionals when needed.

      👉 Explore our range of saddle pads and accessories here for english saddles and here for western saddles, protect your investment—and your horse’s back.

      When evaluating older saddles, it’s essential to assess their overall condition. A well-maintained saddle can provide years of reliable service, while a neglected one could lead to unnecessary harm. For instance, a saddle with dried-out leather can easily crack, potentially causing injury to the horse. Always check for flexibility in the leather and ensure that it has been regularly conditioned.

      Additionally, monitoring your horse’s behavior after riding is crucial. If your horse starts refusing to move forward or shows signs of discomfort when saddling, it could be a direct result of saddle issues. Regularly evaluating their performance and comfort levels can help catch potential problems early, allowing for timely adjustments.

      In Summary

      Yes, an old or cheap saddle can hurt your horse. But with the right care, guidance, and attention to fit, you can avoid the pitfalls and ride with confidence. When in doubt—consult a saddle fitter and put your horse’s comfort first. After all, a happy horse is a willing partner.

      Got questions about saddle fit or accessories?

      Drop a comment below or reach out to us! We’re here to help you and your horse ride in style, and ride in comfort.

      Moreover, the type of riding you do can dictate the type of saddle you need. For example, a jumping saddle typically has a flatter seat to allow for better movement in the air, while a dressage saddle has a deeper seat to help the rider maintain a better position. Understanding the specific requirements of your riding style will aid you in selecting the most appropriate saddle.

      Lastly, as you navigate the world of saddles, remember that many experienced riders and trainers are valuable resources. Engaging with them can provide insights that may not be readily available online or in stores. They can share personal experiences, recommend trusted brands, and help identify what types of saddles have worked well for them. Networking within the equestrian community can lead to better-informed decisions.

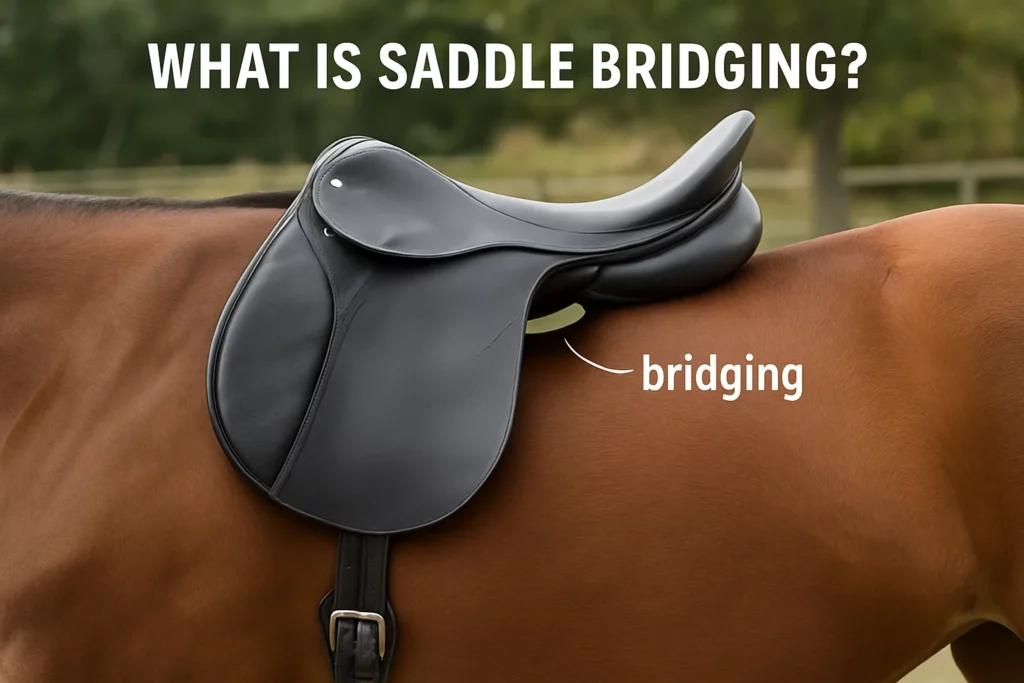
      What Is Bridging In A Saddle, And Why Is It Bad?

      Saddle Bridging

      When it comes to saddle fit, one issue that’s sometimes overlooked, but can cause serious problems is bridging.

      So, what exactly is it?

      Bridging happens when the center of the saddle doesn’t make proper contact with the horse’s back. Instead, the saddle only touches at the front (pommel area) and the back (cantle), creating a gap in the middle. This results in uneven pressure distribution.

      Why is Bridging a Problem?

      1. Discomfort for the Horse
        With the weight concentrated on just two points, the horse can experience pain and muscle soreness. Over time, this can lead to bruising, white hairs (a sign of pressure damage), or even behavioral issues under saddle.
      2. Restricted Movement
        A bridging saddle doesn’t move with the horse’s back properly. This can restrict their range of motion, making it harder for them to perform comfortably or effectively—especially in disciplines that require flexibility and engagement from the back.
      3. Poor Saddle Stability
        Bridging can also cause the saddle to rock or shift during riding, which can throw off your balance and make the ride less secure for you as the rider.

      How to Check for Bridging

      • Visual Inspection: With the saddle placed on your horse (without a pad), observe from the side to see if there’s a visible gap in the middle.
      • Hand Test: Run your hand under the saddle panels from front to back. A noticeable gap or lack of contact in the center indicates bridging.

      Addressing the Issue

      • Professional Saddle Fitting: Consult with a certified saddle fitter to assess and adjust the saddle fit appropriately.
      • Corrective Pads: In some cases, using specially designed saddle pads can help distribute pressure more evenly.
      • Saddle Replacement: If adjustments aren’t sufficient, investing in a new saddle that fits your horse’s conformation may be necessary.

      Final Thoughts

      Bridging is more than just a minor fit issue—it can seriously impact your horse’s comfort and performance. Whether you’re a casual rider or competing regularly, ensuring your saddle has even contact along the back is key. When in doubt, always consult a professional fitter to protect your horse’s wellbeing.

      If you have any further questions or need assistance, feel free to reach out to our team. We’re here to support your equestrian journey every step of the way!

      Further info

      Why Tack Maintenance Matters

      Proper tack maintenance and care is essential for the safety and comfort of both horse and rider. Regular maintenance prevents equipment failure, extends the life of your gear, and ensures optimal performance during rides.

      Essential Tack Maintenance Practices

      clean tack 1

      Saddle

      • Quick once-over: Look for any cracks or loose stitching.
      • Billets and latigos: Ensure they’re secure and not showing signs of wear.
      • Fit check: Make sure the saddle sits evenly and comfortably on your horse’s back

      Saddle Pad

      • Cleanliness: Is it free from dirt and sweat?
      • Condition: Check for any signs of wear or compression spots.
      • Placement: Ensure it’s properly positioned before saddling up.​

      Girth or Cinch

      • Hardware: Inspect buckles and elastic for any fraying or damage.
      • Cleanliness: Remove any dirt or hair that could cause discomfort.
      • Fit: Ensure it’s snug but not too tight, allowing for comfortable movement.

      Bridle & Reins

      • Bit check: Look for rust or sharp edges.
      • Leather: Ensure it’s supple and free from cracks.
      • Stitching: Check for any loose threads or signs of wear.

      Breastplate / Martingale

      • Elasticity: Ensure it’s not overstretched.
      • Fit: Confirm it’s adjusted correctly to allow free movement.

      Weekly Tack Clean & Inspection

      • Leather care: Clean with a suitable leather cleaner and condition to keep it supple.
      • Hardware check: Inspect all buckles, snaps, and other metal parts for signs of rust or damage.
      • Stirrup leathers: Look for stretching or cracks.
      • Saddle pads & girths: Wash or air out to prevent odor and bacteria buildup.

      Monthly Maintenance Checklist

      • Deep cleaning: Disassemble tack for a thorough clean.
      • Inspection: Look for mold, mildew, or dry rot, especially in stored gear.
      • Lubricate hardware: Apply appropriate lubricants to metal parts to prevent rust.
      • Inventory check: Ensure all tack items are accounted for and in good condition.

      Seasonal Tack Care (Every 3–6 Months)

      • Storage: Store off-season tack in a cool, dry place away from direct sunlight.
      • Protective covers: Use saddle covers and bridle bags to protect against dust and scratches.
      • Mold & mildew prevention: Use moisture absorbers in tack rooms during humid months.
      • Inspection: Check for signs of pest damage or other environmental wear.​

      Emergency Tack Repair Kit Essentials

      Useful items to have at hand in your tack room or trailer:

      • Spare Reins or Headstall
      • Chicago Screws or Quick-Fix Buckles
      • Leather Ties or Zip Ties
      • Duct Tape
      • Stitching Awl or Leather Glue
      • Bit Wipes or Sanitizing Spray
      • Extra Girth

      Best Stirrup Irons for English Riding

      Stirrup Irons

      Introduction

      We all know stirrup irons are an essential piece of tack, providing stability, balance, and safety while riding. The right stirrup irons can improve comfort, aid in performance, and enhance safety by preventing the rider’s foot from getting stuck in the event of a fall.

      Choosing the correct stirrup irons is not just about aesthetics—it’s about functionality, rider comfort, and safety. With various designs available on the market, each type of stirrup iron serves a specific purpose, catering to different disciplines and rider needs. Whether you are a beginner looking for extra security, a jumper needing shock absorption, or a dressage rider seeking a traditional look, selecting the right stirrups can make a significant impact on your riding experience.

      In this guide, we’ll explore the different types of stirrup irons, how to choose the best pair for your needs, and how to maintain them for longevity. Understanding the features and benefits of each type will help you make an informed decision, ensuring optimal support and control during your rides.

      Table of Contents

        Types of Stirrup Irons

        1. Fillis Stirrups

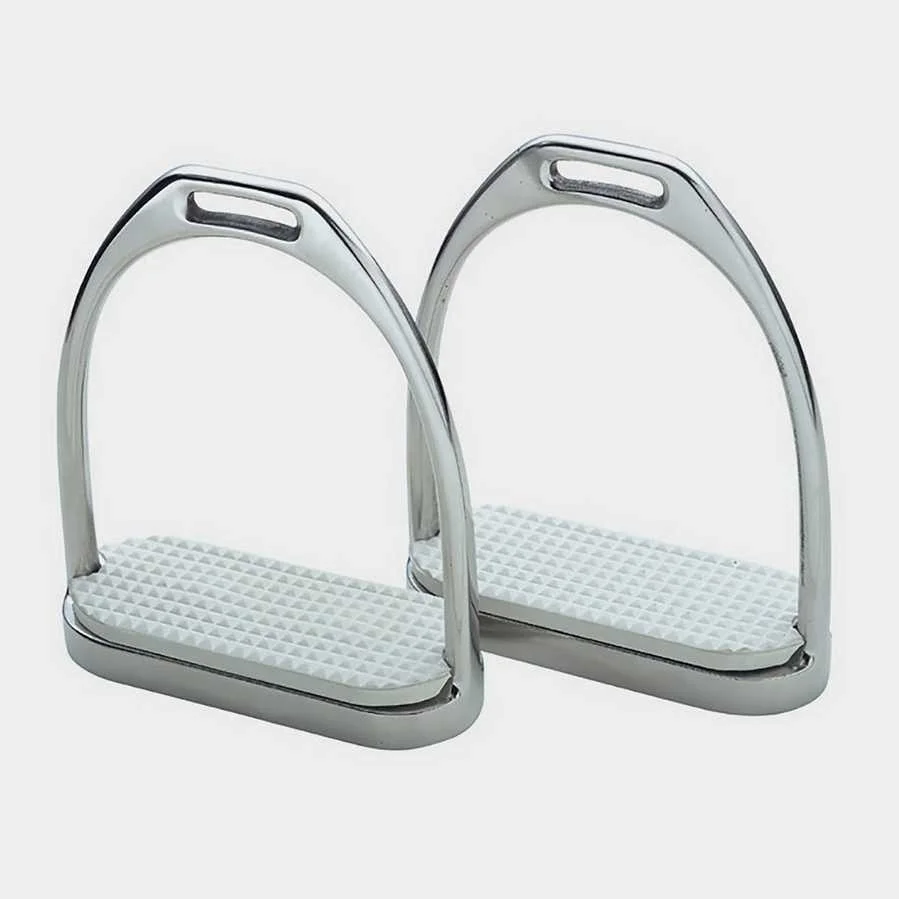
        Fillis stirrups are the most common type of stirrup used in English riding. Made of stainless steel, they feature a heavy design with a thick footbed for stability. They are ideal for dressage, jumping, and general riding.

        2. Peacock Stirrups (Safety Stirrups)

        Peacock stirrups are designed with safety in mind, featuring an elastic band on the outer side. This elastic releases under pressure, preventing the rider’s foot from getting trapped in case of a fall. These stirrups are often recommended for beginner riders and children.

        3. Flexible (Jointed) Stirrups

        Flexible or jointed stirrups have hinges that allow for slight movement in the stirrup arms. This added flexibility helps absorb shock and reduces strain on the rider’s ankles, knees, and hips. They are popular among riders with joint pain or those who jump frequently.

        4. Composite Stirrups

        Made from lightweight materials like plastic or carbon fiber, composite stirrups offer a modern alternative to traditional stainless steel stirrups. They are lightweight yet durable and often feature non-slip treads for extra grip.

        How to Choose the Right Stirrup Irons

        Selecting the right stirrup irons depends on several factors:

        1. Size Matters

        Stirrup irons should be about 1 inch wider than the rider’s boot at the ball of the foot. This provides enough room to avoid getting stuck while still ensuring stability.

        2. Material & Weight

        • Stainless steel is durable and long-lasting but heavier.
        • Composite materials are lightweight and reduce strain on the rider’s legs.

        3. Riding Discipline

        • Dressage riders typically prefer classic Fillis stirrups for their stability.
        • Jumpers and eventers may benefit from flexible stirrups for shock absorption.
        • Beginners and children should consider Peacock stirrups for added safety.

        4. Comfort and Grip

        Look for stirrups with rubber or textured footpads to prevent slipping. Some advanced models even offer ergonomic designs for extra comfort.

        Maintenance Tips for Stirrup Irons

        To keep your stirrup irons in top condition, follow these maintenance steps:

        • Clean after each ride: Wipe them down to remove dirt, sweat, and moisture.
        • Inspect regularly: Check for wear and tear, especially on rubber footpads or jointed hinges.
        • Replace worn parts: If footpads become smooth or damaged, replace them for better grip and safety.
        • Store properly: Keep stirrup irons in a dry place to prevent rusting (for metal stirrups).

        Best Stirrups for Western Riding

        Conclusion

        Choosing the right stirrup irons is essential for comfort, safety, and performance in English riding. Whether you prefer traditional Fillis stirrups, safety Peacock stirrups, flexible jointed stirrups, or modern composite options, selecting the right type for your discipline and needs can make a significant difference in your riding experience. Keep them clean, inspect them regularly, and enjoy a more comfortable and secure ride!

        How To Break In A New Saddle

        th 2

        New Western Saddle

        Getting a new saddle is exciting—just like getting a brand-new car! The fresh leather, the perfect fit, and that unmistakable new saddle smell. But then reality sets in… the leather is stiff, the fenders aren’t budging, and your stirrups are pointing in all the wrong directions.

        Breaking in a saddle takes time, but with the right techniques, you can soften the leather, shape the fenders, and make your ride comfortable much faster.

        This stiffness comes from fresh, unworn leather, and believe me, it’s anything but flexible at first. Think of it like breaking in a brand-new pair of Doc Martens—tough at the start, but worth it in the end!

        A stiff saddle isn’t just uncomfortable for your horse, it’s no picnic for you either.

        The hard leather can create pressure points, leading to soreness, or even blisters especially on the seat and thighs, making every ride feel like you’re sitting on a board instead of a nice comfy seat.

        Breaking in a saddle ain’t just for comfort, it’s crucial for its longevity too. A well-broken-in saddle molds to both you and your horse over time, making each ride smoother. Plus, you get more bang for your buck since the saddle lasts longer and performs way better.

        The advantages go beyond just comfort and durability. Picture less rubbing and fewer injuries for your horse. When broken in right, a saddle enhances your riding experience. In this guide, we’ll walk you through tried-and-true methods to get your saddle feeling like it’s been custom-made just for you.

        Table of Contents

          Step-by-Step Guide to Breaking in Your New Saddle

          Conditioning the leather is your first step to saddle bliss. Think of it like giving your saddle a good massage. Use the right oils and conditioners—bee’s wax or neatsfoot oil work wonders—to bring some much-needed flexibility and softness. Just don’t go overboard. A little dab’ll do ya, otherwise, you’re risking some greasy regrets.

          Now, to really get things going, it’s all about the ride. Short initial rides are the way to go, gradually extending them as you feel the saddle softening and molding. It’s like baby steps for your saddle, easing it into its future shape.

          Then there’s the duo of heat and moisture, which can help soften the leather enough to make it more pliable. Place it in a warm spot or use a hairdryer on low, and consider using a damp cloth. Be careful though, you don’t wanna overdo it and damage that beautiful leather.

          Those stiff fenders and stirrup leathers? They need some TLC too. Try twisting them back and forth to break the initial rigidity. You can hang weights on them or even twist and tie them overnight to help the process along.

          Lastly, let gravity do its thing with a saddle stand. It lets your saddle take on a more natural shape when not in use, like a comfy couch for your trusty equipment. This way, it’s ready and waiting for your next venture into the wild.

          Avoiding Common Mistakes When Breaking In a Saddle

          Everyone makes mistakes, but let’s keep yours to a minimum when you’re breaking in that saddle.

          First on the list of don’ts is over-conditioning the leather. Sure, it’s tempting to slather on the oil like you’re basting a turkey, but too much and you’ll end up with a greasy, heavy mess that’s worse than a sticky steering wheel on a hot day.

          As for using heat and water, moderation’s key. Excessive heat might toughen the leather rather than softening it, and too much water can warp it. Think of it like making toast—crispy is good, burnt is not so good.

          And be patient, rushing the saddle’s adjustment process is a common mistake.

          Give it the time it needs to naturally adapt to you and your horse. If you push it, it’ll only lead to discomfort and a saddle that’ll never quite feel right.

          Avoiding shortcuts pays off in the long run. Breaking in a saddle is as much about the journey as the destination. A little effort now means a lot less hassle later, letting you and your horse ride off into the sunset with ease.

          Conclusion: Achieving Saddle Comfort with Patience and Care

          Breaking in a saddle is all about patience and some tender loving care.. Getting the fit right might feel like a slow process, but it’s worth every minute for the comfort you’ll gain.

          Keeping up with regular maintenance is your ticket to saddle longevity. Regularly check and condition the leather to avoid dry spots that could spell trouble later. Making this a part of your routine ensures not just comfort but a longer lifespan for your favorite riding gear.

          Consider these care habits as an investment in your riding future. Every time you oil that leather or secure it on its stand, you’re getting closer to a saddle that fits like a glove, ready for adventures both great and small.

          Have you ever had to break in a stiff saddle? What tricks or methods worked best for you? Share your experience in the comments below—I’d love to hear your tips and stories!


          The Best Cleaning Products For Western Saddles

          Fiebings Saddle Soap Bar

          Choosing the right saddle care products for your western saddle firstly requires understanding the material it’s made from. Whether it’s leather, synthetic, or a hybrid model, each type requires specific care. Leather saddles, for instance, thrive with cleaning agents that are pH-balanced and specifically designed for leather to maintain their natural oils and prevent cracking.

          When browsing for saddle care products, always check for non-toxic formulations that won’t harm the saddle or irritate your skin.

          Regular maintenance routines with saddle care products are key. Conditioning helps keep the leather supple and looking sharp. It’s not just about removing dirt but also preserving the saddle’s integrity over time. Think of it like brushing your horse – a necessary task for a happy partnership.

          Avoiding common mistakes can save both time and money. Over-saturating leather, using silicone-based or harsh chemical cleaners, or neglecting to thoroughly remove dirt can lead to more harm than good. Start with a clean, damp cloth to wipe away dust and grime before applying any specialized product.

          Knowledge is as sturdy as your favorite pair of boots. When you know what you’re doing, saddle cleaning becomes not just a chore, but part of the ride.

          Top Recommended Cleaning Products for Western Saddles and How to Use Them

          Finding the right cleaning products for your saddle can feel like hitting the jackpot. Some brands have built a solid reputation for their effective and gentle formulas. Keep an eye out for names like Fiebing’s, Leather Honey, and Bickmore. These are favorites in equestrian circles for a reason.

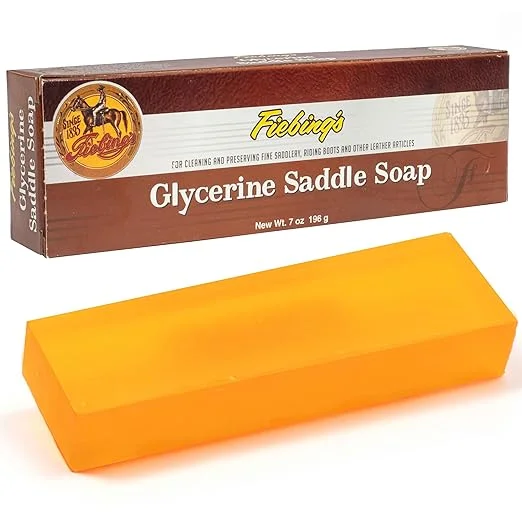
          Each material requires a different approach. Leather saddles benefit from cleaners that remove grime without stripping natural oils. Fiebing’s Saddle Soap, for example, is great for a start. Follow up with a conditioner like Leather Honey to lock in moisture and keep the leather flexible.

          Synthetic saddles often handle cleaners that contain mild soaps or detergents, though be sure they’re formulated not to damage the synthetic fibers. Products like Nikwax Synthetic Saddle Cleaner are crafted to cut through dirt and revitalise the material without hassle.

          For those who prefer the greener options, there are eco-friendly cleaning solutions available that are both biodegradable and safe for skin contact. Look for cleaners that boast plant-based ingredients and eschew harsh chemicals. Your saddle – and the planet – will thank you.

          User reviews can be your guide in this process. Riders often share valuable insights about how certain products stand up under various conditions or how they feel after repeated use. Take note of trends in feedback, such as ease of application or the lasting shine a product delivers.

          Getting hands-on with your saddle care might even become something you look forward to. Equipped with the right products and techniques, you’ll handle your gear like a pro, ensuring it looks good and performs well ride after ride. It’s about making your saddle’s longevity part of every adventure.

          How do you care for your saddle? Share your favorite leather conditioning tips or cleaning routine in the comments below, we’d love to hear from you!

          Further reading: How Should I Clean And Maintain My Western Saddle? – TexanSaddles.com

          Affiliate Disclosure – And last but not least, when you click on links and make a purchase through our site, you’re helping support our work at no extra cost to you! This allows us to keep bringing you the best products and helpful insights. It’s a win-win—improving your equestrian game while supporting our blog. Thanks for being part of the RideInStyleSaddles community!

          How To Properly Clean And Condition Your Western Saddle

          Fiebings Saddle Soap Bar

          Saddle care is crucial for maintaining the beauty and longevity of your saddle. Proper saddle care preserves its lifespan and ensures it remains comfortable for both you and your horse. Regular saddle care also prevents issues that can arise from neglect.

          Dirt, sweat, and grime not only dull your saddle’s appearance but they can cause the leather to wear out prematurely. Cleaning your saddle really doesn’t take long and is totally worth it!

          Neglect a saddle, and you’ll notice not only a decline in its appearance but also its functionality. Think about it like your favorite pair of shoes—a bit of care goes a long way, you’re not gonna get all dressed up and put a pair of dirty shoes on right? Regular maintenance helps protect your investment, with proper maintenance, your saddle will stay in top shape ride after ride.

          And let’s not forget about mold and mildew—they can grow on your saddle if it’s not cleaned and stored properly!

          In this guide, we’ll walk you through the step-by-step process of cleaning and conditioning your Western saddle to preserve its quality and ensure a comfortable ride. Whether you’re a seasoned rider or just starting out, these simple yet effective techniques will help extend the life of your saddle and keep it in peak condition.

          Step-by-Step Guide to Thoroughly Clean Your Saddle

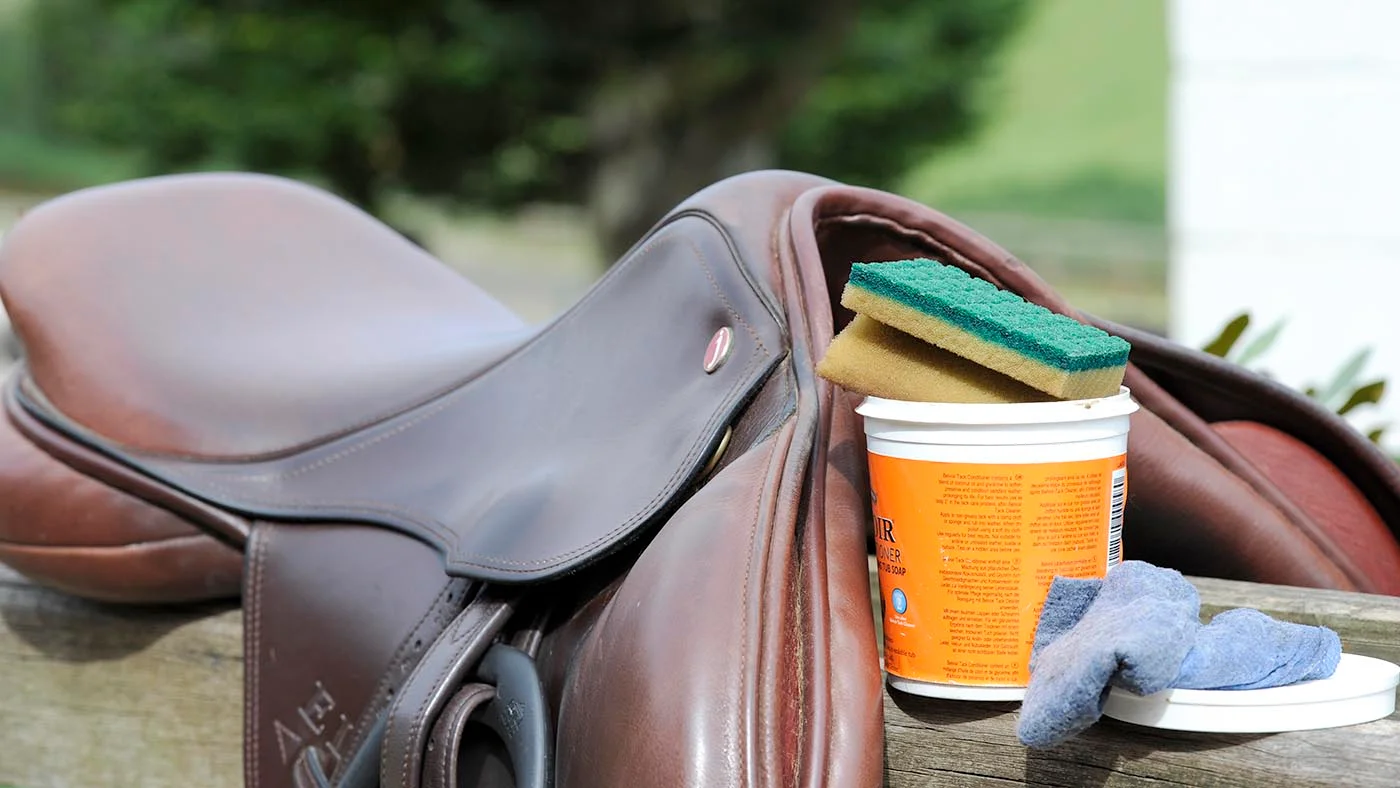
          Getting the right cleaning tools together is a must. Think soft brushes, (toothbrush is also handy)sponges, saddle soap, and a few clean towels. You wouldn’t wash your car with a dirty rag, same logic applies here.

          Start by giving your saddle a gentle once-over with a soft brush or cloth to remove dust and any loose dirt. Get in to those awkward areas with the toothbrush. This step might seem simple, but it helps prevents scratches during the deeper cleaning.

          It’s time to grab the saddle soap. Use a reputable brand like Fiebing’s Saddle Soap
          A traditional cleaner that removes embedded dirt and grime while conditioning the leather to keep it supple. Regular use can extend the life of your saddle. Apply with a damp sponge, working it into a lather on the leather. This helps lift away dirt and grime that may have seeped into the surface. Be gentle—we don’t want to scrub off the natural leather oils.

          After a soapy scrub, make sure to get rid of any soap residue. Use a damp cloth to wipe it clean. Skipping this can lead to build-up, which will dry out and damage the leather over time.

          https://www.youtube.com/watch?v=g_oDJhwVKFI

          Conditioning Your Western Saddle: Promoting Longevity and Appearance

          Conditioning is an essential step that keeps your saddle’s leather in top-notch condition. Undernourished leather is like parched soil, prone to cracks and wear. Conditioning adds moisture and keeps the leather flexible, helping to prevent cracking and dryness.

          Not all conditioners are created equal, so pick one that’s suitable for your saddle’s leather. Avoid any with alcohol or silicone—they might promise a quick shine, but they can dry out the leather in over a period of time. So again use a reputable brand like Bickmore Bick 4 Leather Conditioner

          Applying conditioner is a straightforward task. Use a clean, soft cloth to rub a small amount into the leather, focusing on areas most exposed to wear. Let it soak in, nourishing the fibers and enhancing the leather’s natural gloss.

          How often should I condition ?

          That depends on your saddle’s use and exposure to elements. Generally, conditioning every few months keeps it supple and protected. If you ride often or in harsher environments, you might need to do it a bit more frequently.

          Oiling your Western saddle is a crucial part of maintenance, but it should be done only when necessary to avoid over-oiling, which can weaken the leather. Here’s when you should oil your saddle:

          How Often Should I Oil My Saddle?

          When the Leather Feels Dry or Stiff

          • Leather that feels brittle or has lost its flexibility needs conditioning to restore suppleness. Dryness can occur from exposure to sun, heat, or lack of regular care.

          After a Thorough Cleaning

          • Cleaning with saddle soap or leather cleaner can strip some of the natural oils from the leather. Applying oil afterward replenishes these oils and ensures the leather remains soft and pliable.

          Before Storage

          • If you’re storing your saddle for an extended period, oiling it beforehand can help prevent drying and cracking during storage.

          When Exposed to Harsh Weather

          Saddles that have been exposed to rain, snow, or extreme heat can lose moisture. Oil the saddle after it dries completely to prevent the leather from cracking or becoming stiff.

          Annually or Semi-Annually

          • For regular maintenance, oiling your saddle once or twice a year is sufficient if the saddle is used under normal conditions.

          How to Oil Your Saddle

          • Clean First: Always clean the saddle thoroughly before oiling to remove dirt and debris.
          • Use Appropriate Oil: Use a high-quality leather oil, like neatsfoot oil or a specialized saddle oil.
          • Apply Sparingly: Use a soft cloth or sponge to apply a light coat of oil evenly, avoiding excessive application.
          • Let It Absorb: Allow the oil to penetrate the leather for several hours or overnight.
          • Buff Excess: Wipe off any excess oil with a clean, dry cloth.

          By oiling only when necessary, you ensure your saddle remains in good condition without becoming over-saturated.

          Expert Tips and Common Mistakes to Avoid: Keeping Your Saddle in Top Shape

          When it comes to saddle care, avoiding common mistakes saves time and money. One big no-no is over-saturating the leather to the point it becomes waterlogged, which can cause stretching and permanent damage.

          Consistently check all parts of your saddle. Look for wear and tear in areas like the billet straps and stirrup leathers. Catching issues early prevents small problems from becoming costly repairs.

          Where you store your saddle matters just as much as how you clean it. Humidity is leather’s enemy, leading to mold and mildew. A cool, dry room with good air circulation is ideal.

          It might be tempting to clean and condition your saddle too often, but overdoing it can actually harm the leather by stripping away its natural oils. Instead, check your saddle every month and give it the care it needs when it’s due.

          Also, remember that not all leather is the same. Different types of leather need different care. Take some time to learn about your saddle’s brand and material—some might need special products or techniques to keep them in top shape.

          Reassembling your saddle after cleaning is usually a breeze. Make sure everything is tightened and adjusted appropriately before you use it again. A final check ensures you’ve not missed any spots and that all parts are in place.

          DIY Saddle Repair: What You Can And Cannot Fix At Home

          Fix Saddle

          Untitled 1200 x 600 px 2

          Repairing your saddle at home can save you both time and money while offering a rewarding fix. Having the right know-how can make all the difference between a successful repair saddle and a costly mistake. Not every damage needs a professional hand, and some issues can easily be tackled right from the comfort of your home. Regular maintenance and timely repair saddle actions can extend your saddle’s lifespan.

          Jumping straight into repairs without the right gear is not a good idea! You’ll need basics like a stitching awl, leather needles, and thread, along with some trusty leather conditioner.

          Don’t forget protective gloves and goggles for safety. Leatherwork involves some tough materials, so taking care of your hands and eyes should be a priority when you repair saddle materials.

          When you repair saddle issues, it’s important to assess the damage first to determine the best approach.

          Knowing when to fix things yourself and when to call in the pros is key. Simple problems like loose stitches or minor hardware issues can often be handled on your own. But if the saddle’s integrity is in question, it might be better left to someone trained to tackle the tricky stuff.

          You can often prevent larger issues by addressing routine repair saddle tasks before they escalate.

          What You Can Fix at Home: Common Saddle Repair Tasks

          When you learn how to repair saddle damage effectively, you not only save money but gain valuable skills.

          How to Repair Saddle Damage Effectively

          Digging into minor repairs can be quite satisfying!

          These easy repairs can bring your saddle back to life, saving you the headache of bigger issues further down the line. Tackling simple stitching problems, for instance, can prevent more stitching problems down the line. A leather glue or sewing kit might be your best friend here, helping you reattach threads seamlessly.

          There’s something quite fulfilling about taking on small fixes too. Replacing stirrups or conchos, those nice decorative bits, sounds more daunting than it is. Often, it’s just a matter of unscrewing the old and screwing in the new. Just keep an eye out for matching sizes and styles to maintain the original look. Regular repair saddle tasks like these can vastly improve your overall riding experience.

          Keeping the leather clean and conditioned prolongs your saddle’s life remarkably. Good old elbow grease comes into play here, wiping down dirt and applying a high-quality leather conditioner. This not only maintains the leather’s flexibility but also keeps it looking sharp. Regular conditioning is like a good skincare routine, do it often enough, and you’ll not be long in noticing a healthier glow.

          Those pesky small tears and worn-out patches might seem like a big deal, but they’re quite manageable if caught early. Using leather patches and adhesive on minor issues is pretty straightforward. Cut the patch to size, apply the adhesive, press firmly, and bam, your saddle’s looking almost as good as new.

          When deciding to repair saddle components, always prioritize safety and the structural integrity of the saddle over DIY attempts.

          If you’re unsure about how to repair saddle structures, seeking professional help can save you from costly mistakes.

          Let’s not forget the straps and rings. Replacing billet straps or D-rings can be a relatively easy fix. You just need a punch tool to remove the old and secure the new ones, making sure everything’s secure. Once you’ve mastered these skills, handling further saddle maintenance, including the ability to repair saddle components, will become just like second nature to you.

          What You Cannot Fix: Recognizing Professional Repair Needs

          Sometimes, trying to fix everything yourself can cause more harm than good. Recognizing when a saddle needs professional attention is also about ensuring safety on those long rides. Structural damage, like a broken tree, is definitely one of those “leave it to the experts” situations. This kind of issue affects the saddle’s integrity, risking damage to your horse and yourself.

          Remember, investing in a professional for complex repair saddle jobs can provide peace of mind.

          Then there’s the temptation to jump in on complex repairs. Adjusting or replacing a saddle tree involves specialized skills and equipment that most home workshops can’t replicate. These tasks require precise adjustments to avoid making issues even worse and potentially more expensive.

          Part of maintaining your saddle includes understanding the common repair saddle tasks that can be done at home.

          Attempting major leather replacements, like flap repairs or replacing large sections, often necessitates more than just basic tools. Working with large leather sections requires expertise to match dyes, grains, and sew through heavier materials without damage.

          Recognizing worn-out or damaged padding is another area where a pro can step in. Reflocking a saddle requires special skills and materials, so leave it to the experts as ensuring the comfort of your horse is a must!

          Ultimately, knowing your limits and when a job exceeds them is key. Relying on professionals for these tasks not only saves you headaches but ensures the longevity and safety of your saddle, horse, and riding experience.

          Enhanced Saddle Care: Tips for Longevity and Safety

          Keeping your saddle in top shape isn’t just about fixing it when it’s broken. Regular check-ups and care routines make a big difference. Start by making a habit of quick inspections before and after rides. Spotting early signs of wear and tear can save you from bigger problems further down the road.

          Using high-quality products can go a long way in maintaining your saddle’s condition. Invest in cleaners and conditioners specifically designed for leather gear. A clean saddle reduces wear and minimizes the risk of cracks or splits developing in the leather.

          Storage plays a crucial role too. Avoid damp environments, as moisture can lead to mold and mildew, pesky enemies of leather. Hanging your saddle properly when not in use keeps it off the floor and free from unwanted critters.

          Protect your investment by rotating different saddles if you can, avoiding overuse of just one saddle. This not only prolongs your saddle’s life but also offers your horse variety in feel and fit.

          A steady maintenance routine reaps benefits over time, keeping your saddle reliable for every hack. Regularly maintained tack, including timely repair saddle actions, not only looks good but performs its best, keeping you and your horse comfortable and safe.

          Further Info